Isolate Multiple Cell Types from a Single Sample with Sequential Isolation
Sequential separation, for higher recovery of purified cells from limited sample size and isolation of multiple cell types, is ideal for chimerism analysis
For situations where sample volume is limited and there is a need to isolate multiple cell types, you may wish to perform a sequential separation procedure. This approach avoids dividing the sample and ensures higher recovery of purified cell populations. One application for sequential isolation is chimerism analysis, which is typically performed on small blood samples and requires techniques that can isolate more than one cell type from a single starting sample for lineage-specific analysis.
EasySep™ is an immunomagnetic cell separation technology that can be used to perform sequential cell isolations using either positive or negative selection approaches. This tech tip describes considerations and general protocols for using EasySep™ to perform sequential cell isolation in your lab.
Why Perform Sequential Isolation with EasySep™?
- Isolate several different cell types from starting samples as small as a 1 mL.
- Obtain highly purified cells and maximize cell recovery from a single sample.
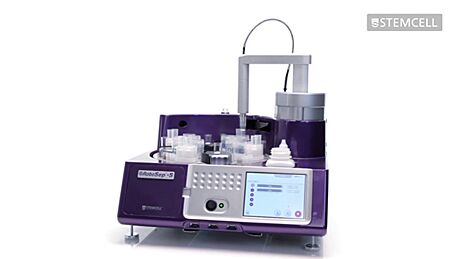
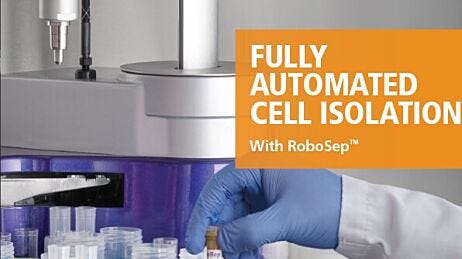
- Automate using RoboSep™.
Examples of Sequential Isolation Workflows
Sequential isolation can be applied to many combinations of cell types from common human and mouse samples, including human peripheral blood mononuclear cells (PBMCs), whole blood, leukopaks, and mouse splenocytes. Sequential isolation can also be automated with RoboSep™. For an example of a fully automated sequential cell isolation, please see here.
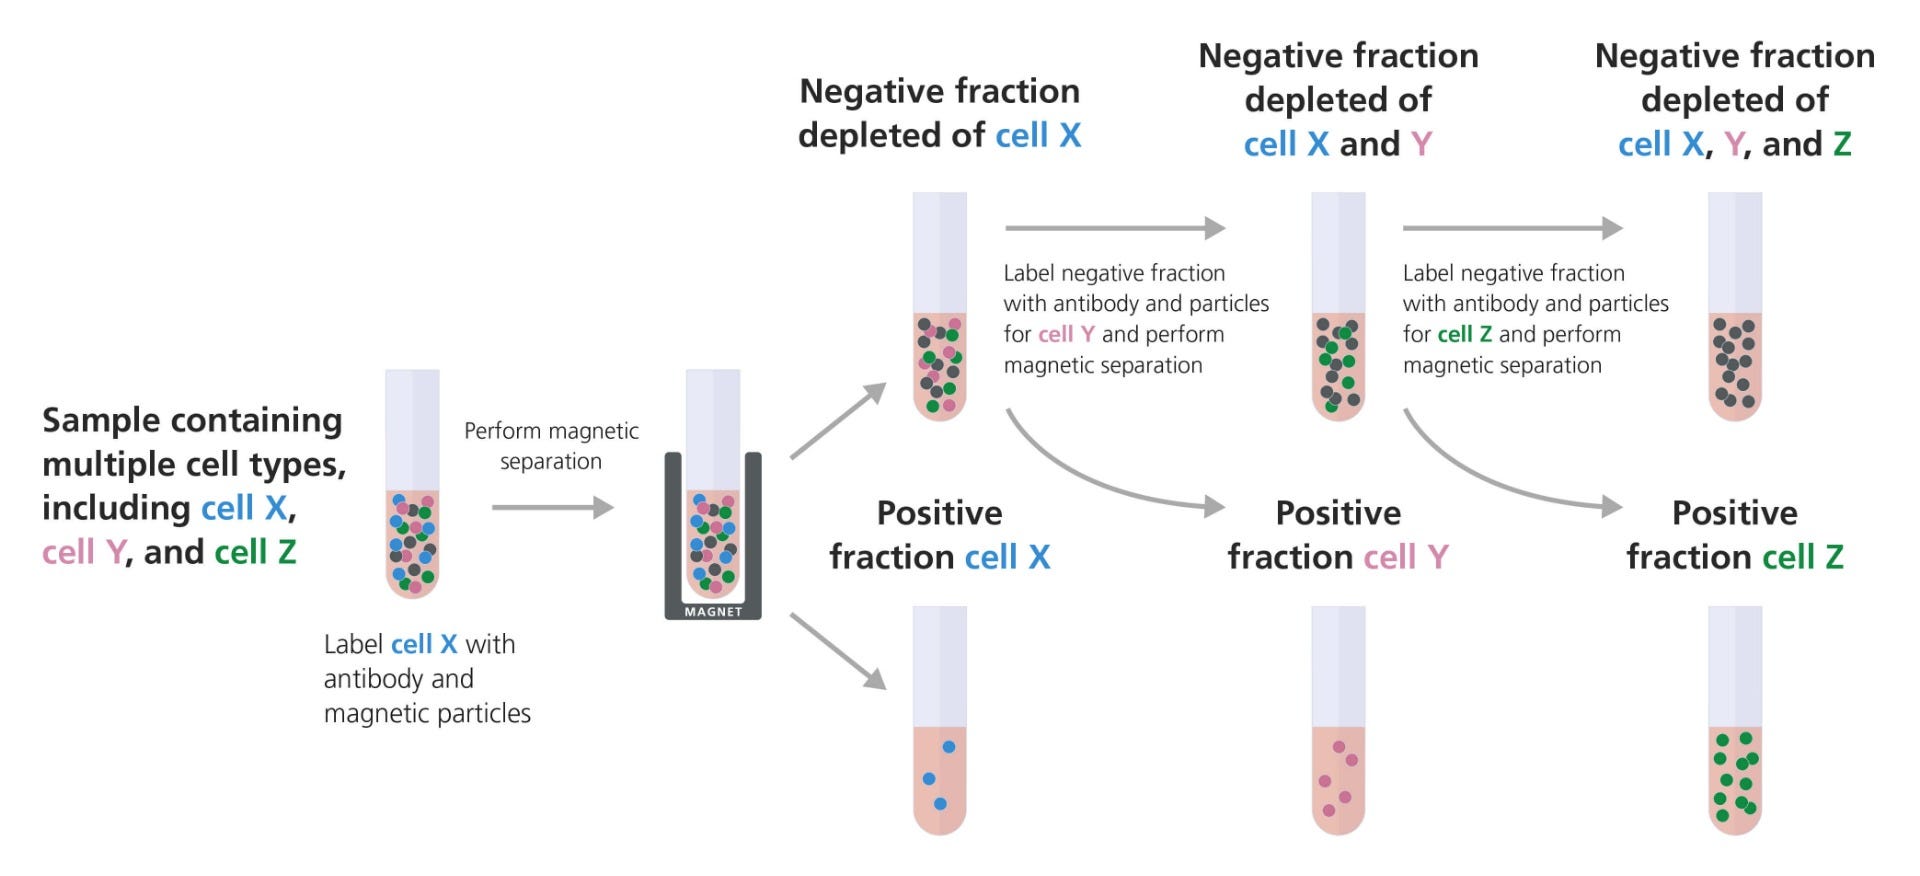
Figure 1. Example of Sequential Isolation Using Multiple Positive Selections to Target Desired Cell Types
The entire sample, containing multiple cell types, is labeled with an antibody cocktail targeting the first cell type (cell X). These cells are then bound to magnetic particles and the sample is placed in the magnet. The supernatant containing the unlabeled cells is removed to a new tube, leaving the first desired cell type in the magnet. The unlabeled fraction from the first separation can then be labeled with an antibody cocktail targeting the second cell type (cell Y). These labeled cells are isolated using an EasySep™ magnet, as described above, and the supernatant is again removed to a new tube for the subsequent isolation. The third cell type (cell Z) is isolated in the same manner, and the supernatant can simply be discarded.
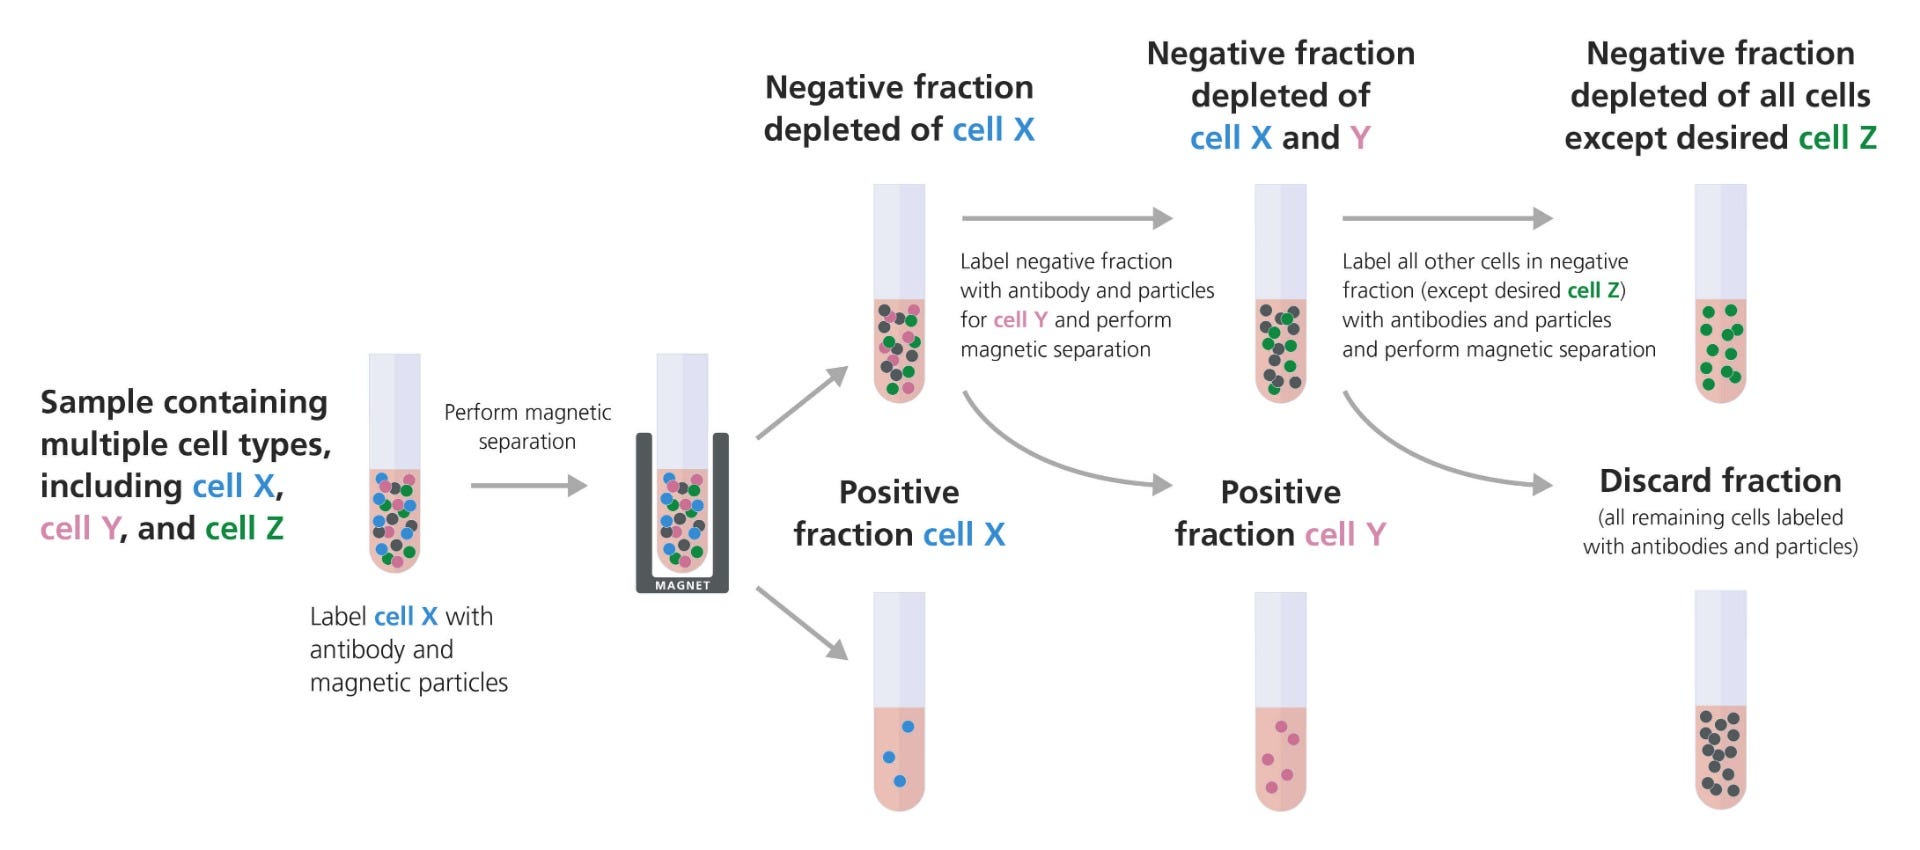
Figure 2. Example of Sequential Isolation Combining Positive and Negative Selection to Target Desired Cell Types
The entire sample, containing multiple cell types, is labeled with an antibody cocktail targeting the first cell type (cell X). These cells are then bound to magnetic particles and the sample is placed in the magnet. The supernatant containing the unlabeled cells is removed to a new tube, leaving the first desired cell type in the magnet. The unlabeled fraction from the first separation can then be labeled with an antibody cocktail targeting the second cell type (cell Y). These labeled cells are isolated using an EasySep™ magnet as described above, and the supernatant is again removed to a new tube for the final separation step. The third cell type (cell Z) is isolated by negative selection, whereby all remaining cells except the desired cells are labeled with antibodies and particles for depletion. The unwanted, labeled cells will remain in the magnet, and the desired cells (Z) are poured into a clean tube.
Considerations for Designing a Sequential Isolation Workflow with EasySep™
- Positive selection of a desired cell type must always be performed on an unlabeled cell population; either (a) the original starting sample or (b) the poured-off fraction from a positive selection.
- Negative selection of a desired cell type is typically performed on an unlabeled cell population; either (a) the original starting sample, or (b) the poured-off fraction from a positive selection.
- Positive selection of more than one rare cell type (starting frequency <10%) should be avoided. Instead, one of the rare cell types should be isolated by negative selection or by dividing the starting sample.
- To minimize cell loss, we generally recommend isolating the rarest cell type first , and the most frequent cell type last. There may be circumstances where this convention cannot always be followed.
- It is ideal to begin with a minimum of 1 mL of starting sample.
- Only the first pour-off of a positive selection should be used for subsequent cell isolations. Pooling all pour-offs from the positive fraction will result in carry-over of labeled cells into subsequent isolations.
Note: Please contact techsupport@stemcell.com for advice on how to optimize the isolation of rare or difficult cell types in a sequential manner and recommendations on your sequential isolation approach.
For an automated sequential isolation using RoboSep™ that will require a custom protocol, please contact techsupport@stemcell.com for further information.
General Sequential Isolation Protocol for Concentrated Cell Samples
This is a general protocol for concentrated cell samples like PBMCs, leukopaks, and mouse splenocytes.
- Adjust the cell concentration as recommended in the Product Information Sheet (PIS) for the EasySep™ kit of the first cell type being isolated. The concentration should be adjusted with EasySep™ Buffer (Catalog #20144).
- Follow the instructions in the PIS for the EasySep™ kit of the first cell type being isolated, up until the first magnetic separation. Save the pour-off from the first magnetic separation, as this will be used for subsequent isolations. Concentrate the cells in the pour-off by centrifuging at 300 x g for 10 minutes. Aspirate the supernatant and resuspend the cells at the recommended concentration indicated in the PIS for the EasySep™ kit of the next cell type being isolated.
- While the first pour-off is being centrifuged, execute the remaining separations for the first cell type as described in the PIS. This concludes the isolation of the first cell type.
- Once the cells of the first pour-off have been pelleted and adjusted to the recommended concentration, repeat Step 2 for the second cell type being isolated.
- Proceed as described above for each subsequent positive selection. If a negative selection is being used for the last cell isolation, note that the pour-off will contain the desired isolated cell type.
General Sequential Isolation Protocol for Human Whole Blood
This is a general protocol for positive isolation from human whole blood, buffy coat, or leukoreduction system (LRS) chamber/cones using EasySep™ HLA Chimerism Whole Blood kits.
- Dilute the sample with an equal volume of 1X EasySep™ Red Blood Cell Lysis Buffer (Catalog # 20110). Ensure the total diluted volume is ≥ 1.0 mL. If the volume is < 1.0 mL, top up the volume to 1.0 mL with EasySep™ Buffer (Catalog #20144).
- Follow the instructions in the PIS for the EasySep™ kit of the first cell type being isolated, but do not execute the top-up step prior to the first separation.
- Perform the first separation as indicated in the PIS. Save the pour-off from the first magnetic separation, as this will be used for subsequent isolations.
- Execute the remaining separations for the first cell type as described in the PIS, including the top-up step. This concludes the isolation of the first cell type.
- With the first pour-off (from Step 3), proceed with the instructions in the PIS of the EasySep™ kit for the second cell type, and proceed with Step 2 onwards. Continue in this same manner for up to 3 different cell types. Note that for the final cell type, the top-up step should be performed prior to the first separation.
Note: For an automated sequential isolation using RoboSep™ that will require a custom protocol, please contact techsupport@stemcell.com for further information.
In certain circumstances, the performance of cell isolations in a sequential manner may not be as high as individual isolations. However, we can work with you to suggest ways to tailor and optimize the performance based on individual needs. For more information, please contact us at techsupport@stemcell.com.
Related Resources


On-Demand Human Immune Cell Isolation Course
Learn how to effectively process human samples and isolate highly pure target cells with EasySep™ in this free self-paced course.

Blood Sample Preparation E-Book
Learn about different techniques and protocols for processing blood samples to help choose the right method for your application.
Request Pricing
Thank you for your interest in this product. Please provide us with your contact information and your local representative will contact you with a customized quote. Where appropriate, they can also assist you with a(n):
Estimated delivery time for your area
Product sample or exclusive offer
In-lab demonstration


