Cryogenic Tissue Processing and Section Immunofluorescence of Neural Organoids

Neural organoids provide a physiologically relevant human model for the central nervous system (CNS). These 3D cultures enable the study of normal and disease states in human brain development, including autism1 and schizophrenia2, or brain defects caused by viral infection.3
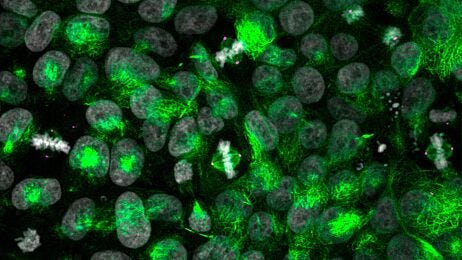
A primary advantage of using human pluripotent stem cells (hPSCs) to create neural organoids is the recapitulation of the 3D organization of the developing brain. In order to capture and analyze this complex cytoarchitecture, specialized histological methods are required. In addition to careful handling, these organoids require adequate penetration, fixation, and cryoprotection to preserve their histomorphology. Each of these steps can also affect the characterization of phenotypes, through preservation or modification of protein structure that determines epitope availability.
Read on for a step-by-step guide to processing mature neural organoids for cryosectioning and immunofluorescence (IF) to minimize tissue damage and preserve important epitopes.
Important Notes
- The protocol below recommends fixation using paraformaldehyde. Aldehyde-based fixatives (e.g. formaldehyde, glutaraldehyde) are advantageous for preserving secondary and tertiary protein structure, although overfixation can mask epitopes. Dehydration-based fixatives (e.g. methanol, ethanol) may be useful for exposing hidden epitopes, but can also destroy other epitopes. Because sample preparation has a large bearing on the quality of downstream staining in any immunostaining protocol, some antibodies may perform better with dehydration-based tissue fixatives.
- Refer to the relevant Product Information Sheet (PIS) or contact us for a list of recommended antibodies.
Materials and Reagents
Materials
- Coplin Staining Jars (e.g. Millipore Sigma Catalog #S5516)
- ImmEdge™ Hydrophobic Barrier PAP Pen (MJS Biolynx Catalog #VECTH400)
- 1000 µL Pipette Tips (e.g. Catalog #38031)
- P1000 Pipettor (e.g. Catalog #38058)
- 50 mL conical tubes (e.g. Catalog #38010 / Catalog #200-0520)
- Cryostat
- Microscope slides and coverslips
- Dry ice
- Embedding mold (e.g. Ted Pella Inc. Silicone embedding molds (Product ID: 106, 110 or 10505) or VWR Catalog #103302-332)
Reagents
- 4% Paraformaldehyde (PFA) solution (Catalog #100-1450)
- Sucrose (Sigma-Aldrich Catalog #S0389)
- D-PBS (Without Ca++ and Mg++) (Catalog #37350)
- Tween® 20 (Sigma-Aldrich Catalog #P9416-100ML)
- Gelatin from Porcine Skin (Sigma-Aldrich Catalog #G2500-1KG)
- Sodium azide (Sigma-Aldrich Catalog #S2002)
- 100% ethanol
Protocol
Part I. Preparation of Reagents
30% Sucrose Solution
To prepare 1 L of 30% sucrose solution:
- Weigh 300 g of sucrose.
- Add D-PBS to a final volume of 1 L.
- Mix thoroughly. Store at 2 - 8 °C if not used immediately.
Gelatin Solution (prepare fresh)
To prepare 100 mL of gelatin solution:
- Add 10 g of sucrose to 100 mL of D-PBS.
- Add 7.5 g of gelatin to the sucrose solution from step 1.
- Mix thoroughly. Use immediately.
PBS-T
To prepare 1 L of 0.1% PBS-T:
- Add 1 mL of Tween® 20 to 1 L of D-PBS.
- Mix thoroughly. Store at room temperature (15 - 25°C) if not used immediately.
Primary Dilution Buffer
To prepare 100 mL of Primary Dilution Buffer:
- Add sodium azide to 100 mL of PBS-T to a final concentration of 0.05%.
- Add BSA to 100 mL sodium azide/PBS-T solution (from step 1) to a final concentration of 5%.
- Mix thoroughly. Store at room temperature if not used immediately.
Blocking Solution (prepare fresh)
- Dilute Normal Donkey Serum in PBS-T to a final concentration of 5%.
- Mix thoroughly. Use immediately.
Part II. Fixing Neural Organoids
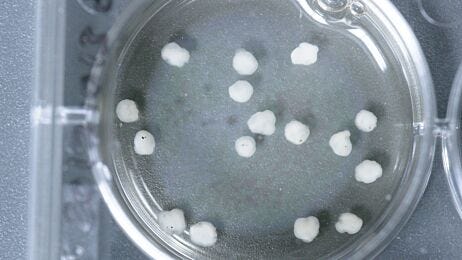
- Cut the end off a 1 mL (p1000) pipette tip. Using the cut pipette tip, transfer cultured neural organoids to a fresh 50 mL conical tube. As many organoids as desired may be transferred to a single tube, as long as they are all completely submerged in all subsequent steps.
Note: To preserve cytoarchitecture, it is important not to disturb organoids during transfer. Pipette tips can be cut to a larger diameter as needed to accommodate organoid size.
- Remove excess medium from the tube. Wash 3X for 10 minutes each with D-PBS. Remove D-PBS.
- Add 5 mL fresh 4% paraformaldehyde solution (PFA) per organoid. Incubate overnight (i.e. 16 hours) at 2 - 8°C.
Note: Detection of cytoarchitecture in neural organoids via immunofluorescence requires proper and thorough fixation of samples. Therefore, we recommend using freshly prepared 4% PFA solution from frozen stock aliquots.
- Remove PFA from the conical tube and dispose of it according to appropriate waste handling procedures. Wash organoids 3X for 10 minutes each with PBS-T.
- Store samples in PBS-T at 2 - 8°C for up to 1 week.
Part III. Cryoprotection
To protect against freezing artifacts, equilibrate samples in a 30% sucrose solution (see Part I: Preparation of Reagents), as follows:
- Remove PBS-T from organoids and discard. Add 5 mL 30% sucrose solution per organoid.
- Allow to equilibrate overnight at 2 - 8°C.
Note: Time to equilibrate can vary due to organoid size and density. Once organoids no longer float in the 30% sucrose solution, it is appropriate to move to the next step.
Part IV. Embedding
- Warm gelatin solution to 37°C in a water bath.
- Pipette sucrose solution out of conical tube and discard. Add enough gelatin solution to completely cover organoids.
- Incubate at 37°C for 1 hour. This allows the gelatin to penetrate and encapsulate the organoid.
- Remove organoids from conical tube and transfer to embedding mold.
Notes:
- Gelatin is preferable for neural organoids over other embedding reagents such as optimal cutting temperature compound (OCT), as it provides better rigidity and supports the generation of smooth, clean sections.
- Gelatin will begin to polymerize and harden at room temperature; it is necessary to quickly transfer organoids to the embedding mold.
- A thin layer of gelatin embedding solution may first be added to the mold and allowed to solidify prior to adding the organoid. This will allow the organoid to be positioned more easily toward the center of the block. Once the organoid has been placed in the mold and the embedding solution has been topped up, use a pipette tip to reposition the organoid if needed.
- Multiple organoids may be embedded in a single block if desired.
- Older/larger organoids may have necrotic centers, which means they can shear more easily during sectioning. These samples can benefit from being embedded in larger gelatin blocks to provide more external support. Additional incubation time with liquid gelatin at 37°C before embedding can also help by allowing the gelatin to better penetrate the tissue and provide support.
Part V. Snap Freezing
Rapid freezing helps to prevent the formation of ice crystals in the organoids and to maintain the native cellular architecture of the sample.
- Prepare a dry ice/ethanol slurry by adding dry ice to 100% ethanol.
- Once the mixture stops boiling, add the embedded sample by holding the embedding mold with forceps and submerging it into the slurry.
- Keep the sample in the cold slurry until completely frozen, then transfer to a -80°C freezer for long-term storage.
Note: If freezing artifacts are still present in samples, snap freezing can also be done via immersion into an isopentane bath chilled with liquid nitrogen. Alternatively, samples may be placed directly into liquid nitrogen in an appropriate vessel such as a dewar flask.
Part VI. Cryosectioning
- Remove blocks from the -80°C freezer and allow them to warm to sectioning temperature in the cryostat for 30 minutes.
Note: Optimal sectioning temperature for gelatin-embedded organoids is -26 to -30°C.
- Thickness can be adjusted to suit the imaging system. Typical section thickness is 10 - 20 μm.
Note:
- Collection of multiple serial sections can allow exploration of different markers in different sections.
- If sections are curling, use a thin brush that has been cooled and kept in the cryostat chamber to gently flatten the section before mounting it on the slide.
- Always use a new, sharp blade for sectioning.
Part VII. Immunofluorescence Staining
- Remove sectioned slides from the freezer and allow to dry at room temperature.
- Outline sections with a PAP pen. When the pen wax is completely dry, proceed to the next step.
- If necessary, perform antigen retrieval in lieu of step 4, as described below (recommended). Otherwise, proceed directly to step 4.
Antigen Retrieval
Antigen retrieval is optional, but highly recommended.
Cross-linkages formed by PFA fixation may interfere or block antibody binding to the epitope of interest (reviewed by Shi et al. 1997).4 For that reason, detection of certain samples will require an additional antigen retrieval step before incubation with primary antibodies.
Additional Equipment and Reagents Required
- Food steamer (e.g. Hamilton-Beach 37530)
- Heat-resistant plastic Coplin staining jar
- Tri-sodium citrate (dihydrate)
Preparation of Citrate Buffer
To prepare 1 L of citrate buffer:
- Add 2.94 g of Tri-sodium citrate (dihydrate) to 950 mL of dH20.
- Adjust pH to 6.0 with HCl/NaOH.
- Add 0.5 mL of Tween® 20.
- Top up to 1 L.
Antigen Retrieval Protocol
- Place slides in a heat-resistant plastic Coplin staining jar and fill with citrate buffer.
- Place Coplin jar in food steamer and steam for 20 minutes.
- Carefully remove hot citrate buffer and wash slides 3X in PBS-T for 10 minutes each.
- Wash slides with PBS-T at 37°C for 10 minutes to fully remove gelatin from slides.
- Lay slides flat and pipette enough Blocking Solution to completely cover sections. The borders formed by the wax pen will hold blocking solution on the sections of tissue.
- Incubate at room temperature in a humidified chamber for 1 hour.
- Prepare primary antibody mixes in Primary Dilution Buffer.
- Pour Blocking Solution off of slides and replace with primary antibody mix.
- Incubate at room temperature in a humidified chamber overnight (16 hours).
- Prepare secondary antibody mixes in PBS-T.
Note: Alexa Fluor® antibodies are very stable, but care should be taken not to leave antibodies in direct light for an extended period of time.
- Pour primary antibody mix off of slides and place slides in a Coplin staining jar.
- Wash slides 3X with PBS-T.
- Lay slides flat and pipette secondary antibody mix onto the slides. Incubate at room temperature in a humidified chamber for 2 hours.
- Pour off secondary antibody mix and place slides in a Coplin staining jar.
- Wash slides 3X with PBS-T for 30 minutes each.
- Air-dry slides for 5 minutes.
- Add PermaFluor™ to slides and add coverslip. Store at 2 - 8°C and allow to dry before imaging.
Blocking
Primary Antibodies
Secondary Antibodies
Coverslips
Expected Results
Please refer to the individual product pages for expected results.
Additional Resources

References
- Forsberg S et al. (2018) Epigenetics and cerebral organoids: promising directions in autism spectrum disorders. Transl Psychiatry 8(1): 14.
- Stachowiak E et al. (2017) Cerebral organoids reveal early cortical maldevelopment in schizophrenia-computational anatomy and genomics, role of FGFR1. Transl Psychiatry 7(11): 6.
- Lancaster M et al. (2013) Cerebral organoids model human brain development and microcephaly. Nature 501(7467): 373–9.
- Shi S et al. (1997) Antigen retrieval immunohistochemistry: past, present, and future. J Histochem Cytochem 45(3): 327–43.
Request Pricing
Thank you for your interest in this product. Please provide us with your contact information and your local representative will contact you with a customized quote. Where appropriate, they can also assist you with a(n):
Estimated delivery time for your area
Product sample or exclusive offer
In-lab demonstration


